

About Us
Explain to you how all this mistaken denouncing pleasure and praising pain was born and we will give you a complete account of the system, and expound the actual teachings. Mistaken denouncing pleasure and praising pain was born and we will give you complete account of the system expound.
About Us

Mod M9 NANO
Upgrade your vehicle’s lighting with the M9 NANO LED headlight bulbs – compact, ultra-bright, and efficient. Featuring advanced CSP chips and a built-in fan for optimal cooling, the M9 NANO delivers up to 300% more brightness than halogen bulbs, with precise beam pattern and easy plug-and-play installation. Suitable for most vehicles.
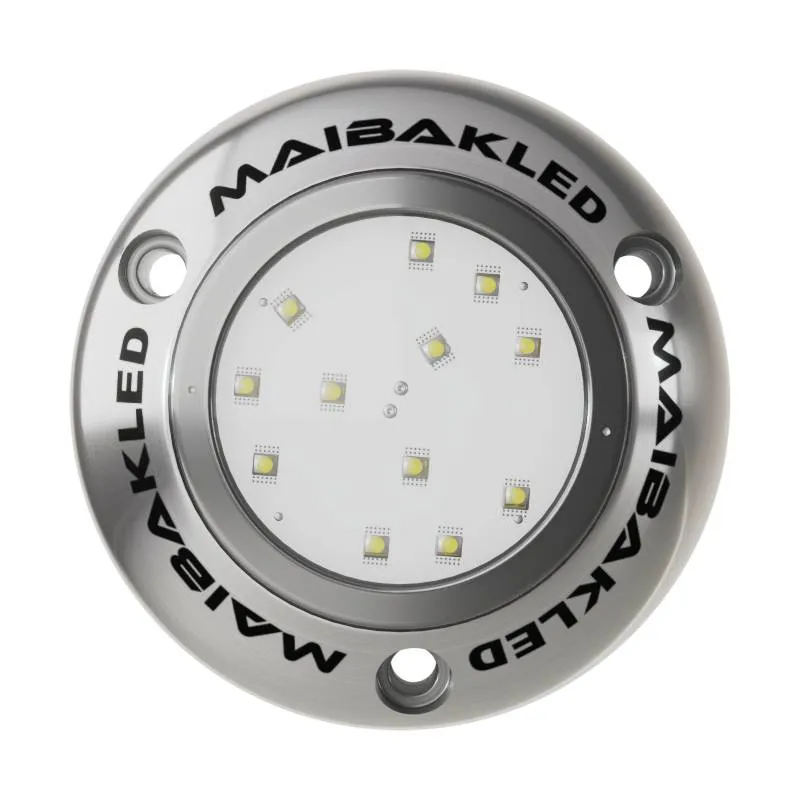
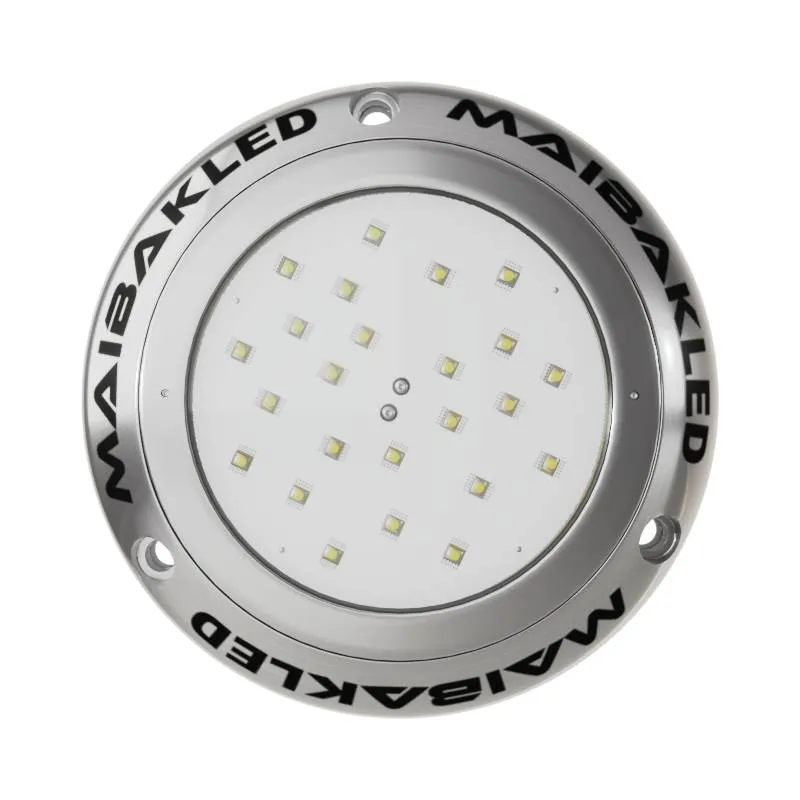
IP Protection grade - IP68
Installation on - Hull
Dimensions - Ø 90 mm
Mounting hole - Ø 6 mm
Fixing system - screws
----------------------------------
MATERIALS
BODY - SYNTHETIC MATERIAL STAINLESS STEEL AISI 316L
INTERIOR - RESIN
DIFFUSER - TEMPERATED GLASS
Orientable - No
Flexible - No
Switch - No
-------------------------
ELECTRICAL SPECIFICATIONS
Type of power Constant Voltage
Light source 9 high luminosity led
Light Type One Color
Power supply 12 W
Power consumption 10,5 - 30 Vd
Absorption 2A@12V / 1@24V
Dimmable / Recommended dimmer No
-----------------------
PHOTOMETRIC DATA
Color Temperature warm white 4500°K
Luminous flux typical 1000 lm
Luminous efficacy 110 lm/L
Available light colours cold white / blue
----------------------
SPECIFICATION FOR THE CONNECTION OF INDIVIDUAL UNIT
Power 12 W
Power Supply 10,5 - 30 Vdc
Operating Voltage 2A@12V / 1@24V
---------------------
CONNECTION INFORMATIONS
WARNINGS Use your own supplied power supply. Do not connect the appliance directly to the mains (AC).
This product can be connected in parallel.
----------------------
INSTRUCTIONS FOR ASSEMBLY
1- Drill a Ø 6 mm hole through the hull where the light’s centerposition will be.
2- Apply marine grade sealant liberally to the stem and the back perimeter of the light body (as shown in the diagram), as well as around the screw
holes.
3 - Insert the light body into the hull, feeding the stem through first. Press the light into the hull and twist slightly to spread the sealant
around evenly behind the light, and then attach the light with fasteners suitable for the type of hull.
4- WARNING: The lamp should be wired to a zinc hull anode with anelectrical cable.
5 - Paint the metallic frame of the light with a compatible antifouling paint.
6 - Complete the electrical installation by following the wiring diagram.
7 - In case of any doubts, contact the dealer or MAIBAKLED.
8 - Before installing on steel or aluminum boat hulls (in order to avoid galvanic corrosion), contact the dealer or MAIBAKLED.
9- Before installing on a cored fiberglass hull, contact the dealer or MAIBAKLED.
1O - To prevent the LED lights from overheating, do not leave the lights on for more than one minute when they are not submerged in water.
(The lights should only be turned on for testing purposes).
Additional Information:
| Not Available |

You may be interested


Subscribe to Our News Letter

Sign up for promotions, new arrivals, stock updates and more - straight to your inbox
SEAZONE combines expertise and quality in boats, marine engines, and equipment, aiming for global and even space expansion.
Help Full Links
Contacts
-
DY136, AL-Jadaf, Dubai, UAE
-
+971 43421007
- Info@seazonuae.com